

Data Hierarchy
Option 1: Projects via Network Manager
Nayax Energy Core’s Projects system is a purpose-built onboarding workflow that streamlines the entire process of bringing a new site online. Rather than configuring each component separately, Projects coordinates the work across installers, site hosts, and network administrators in a single guided flow. With Projects, stations can be onboarded as they are installed in the field by the installer, while site hosts fill out location information on their end. Once everything is in place, the network reviews, approves, and deploys the project directly from Network Manager. This collaborative approach makes the process seamless, reduces delays, and cuts project timelines from several months down to a few days. Built for:- Network operators managing large-scale deployments across multiple sites and installers.
- Installers who need a simple way to onboard stations as they are installed in the field.
- Site hosts who want to provide location details on their own schedule without coordinating back and forth with the network.
- Teams looking to reduce project timelines — Projects compresses what typically takes months into days by running tasks in parallel rather than sequentially.
Coming soon: A detailed guide for the Projects workflow.
Option 2: Set Up Manually via Network Manager
Network Manager is Nayax Energy Core’s enterprise management console for charge point operators (CPOs) and network administrators. We recommend using the UI to upload locations and stations easily. However, if you prefer uploading them using CSV templates, go to Account > Bulk Uploads to get started.
Note: To ensure that onboarded stations connect to the Network Manager (CSMS), the OCPP URL configured on the physical station must be set to wss://ocpp-gateway.lynkwell.com.
Step 1: Create a Site Partner
A Site Partner is an associated partner that has a vested interest in the location. This could be a parent company, a utility, or a reporting company.Every location must be associated with at least one Site Partner. This is a required field when creating a location.Site Partner Types:
To create a Site Partner:
- In Network Manager, click Site Partners in the left sidebar menu.
- Click the Create Site Partner button.
-
Complete the form with the following fields:
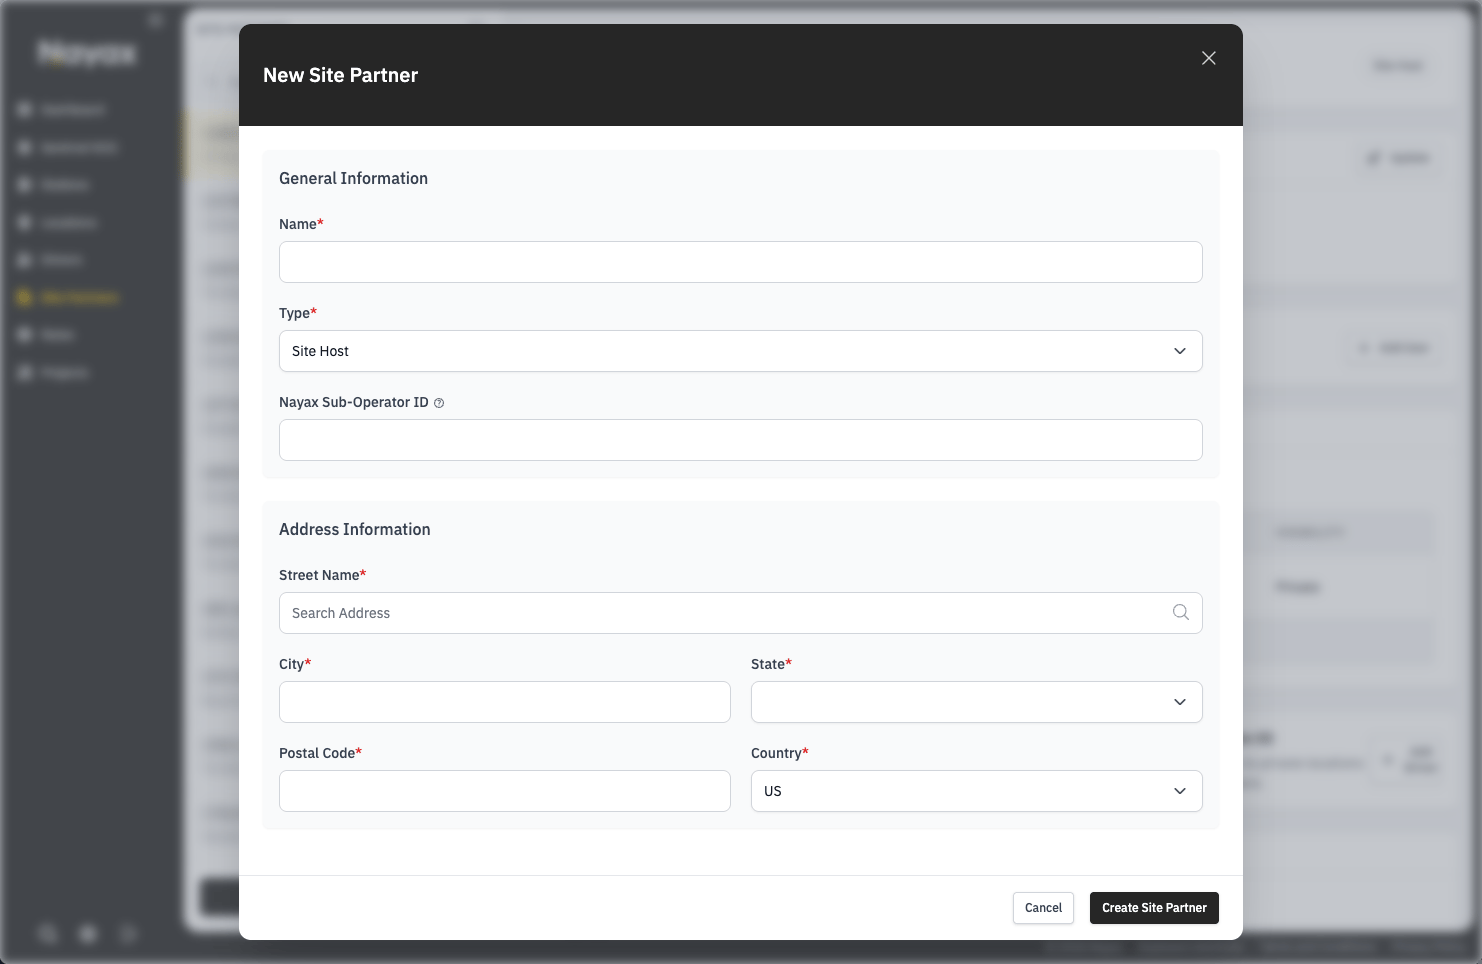
- Click Create Site Partner to save.
Step 2: Create a Location
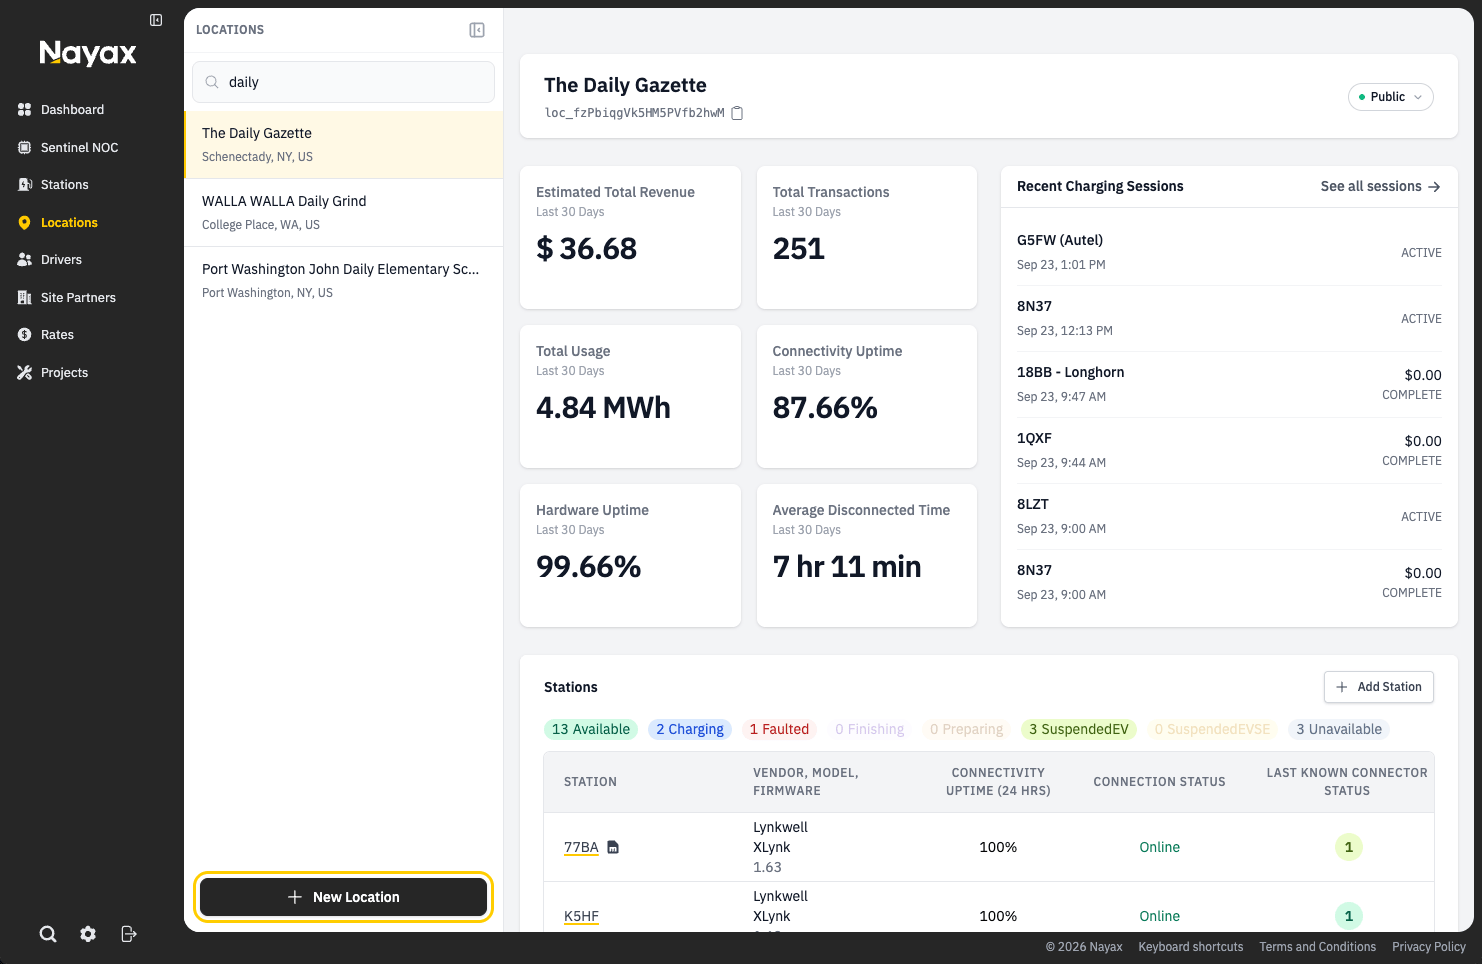
A Location (also referred to as an asset group) represents the physical charging site. Locations contain one or more stations (individual charging assets). Each location is associated with one or more site partners, which determines which site host users can view and manage the location and its stations through Site Manager. To create a Location:- In Network Manager, click Locations in the left sidebar menu.
-
Click New Location.
-
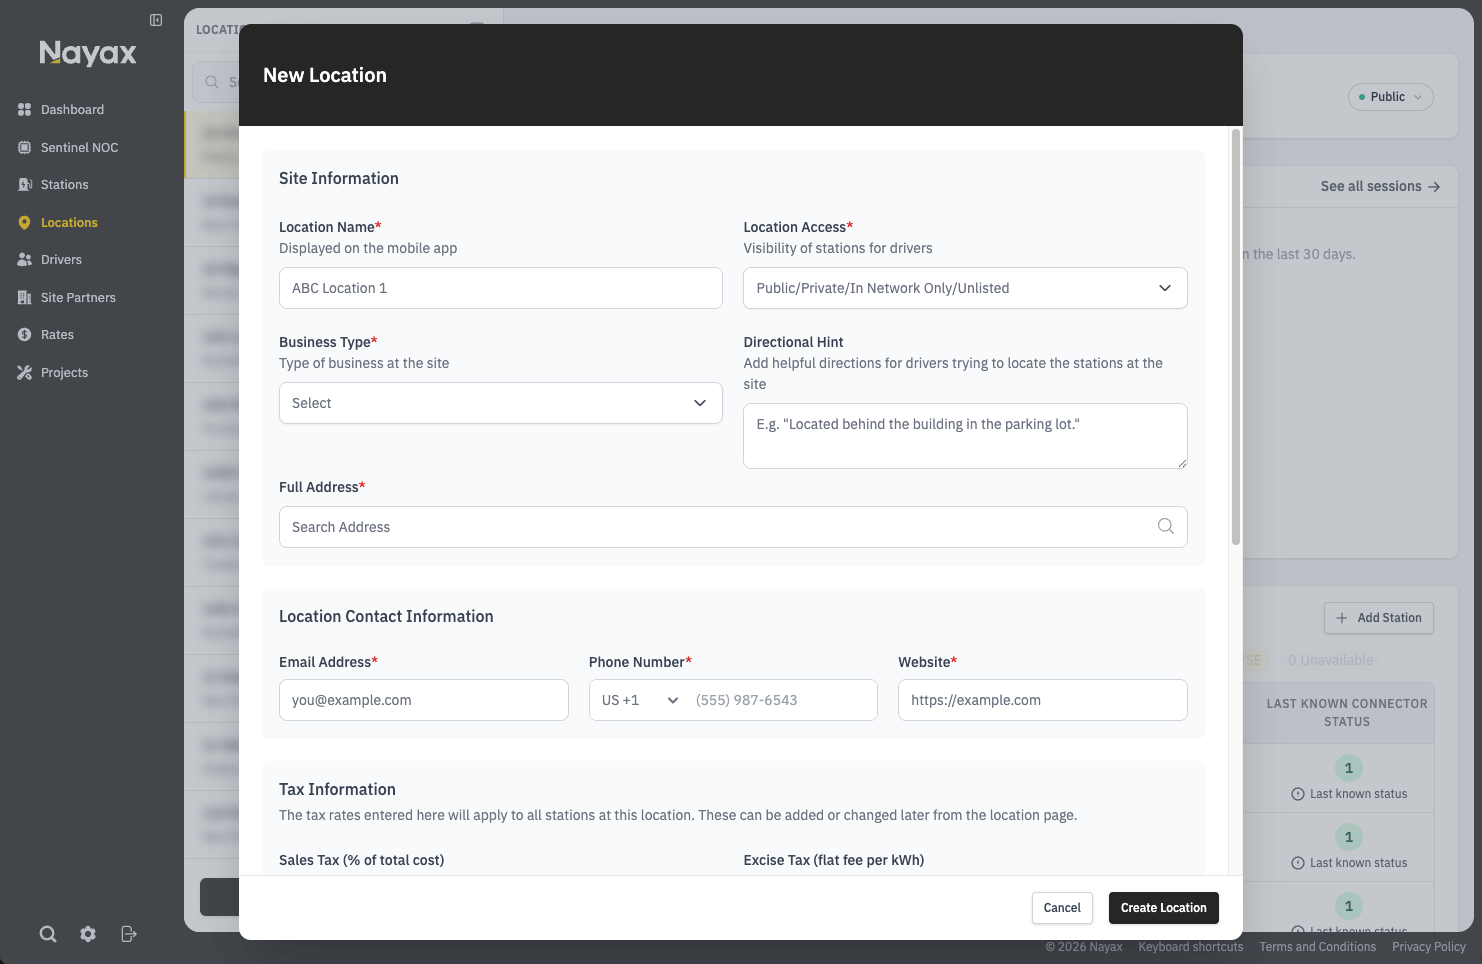
Complete the form with the following fields:
Site Information
Location Contact InformationTax Information Optionally record the tax rates that apply at this location. The platform only reports these rates — remittance responsibility varies by agreement and jurisdiction. Drivers see a tax-inclusive rate.Add Site Partners This section links the location to one or more Site Partners. All site host users associated with the selected Site Partners will be able to view this location and its associated stations in the Site Manager or Depot Portal. Use the search field to find Site Partners by name, type or ID.
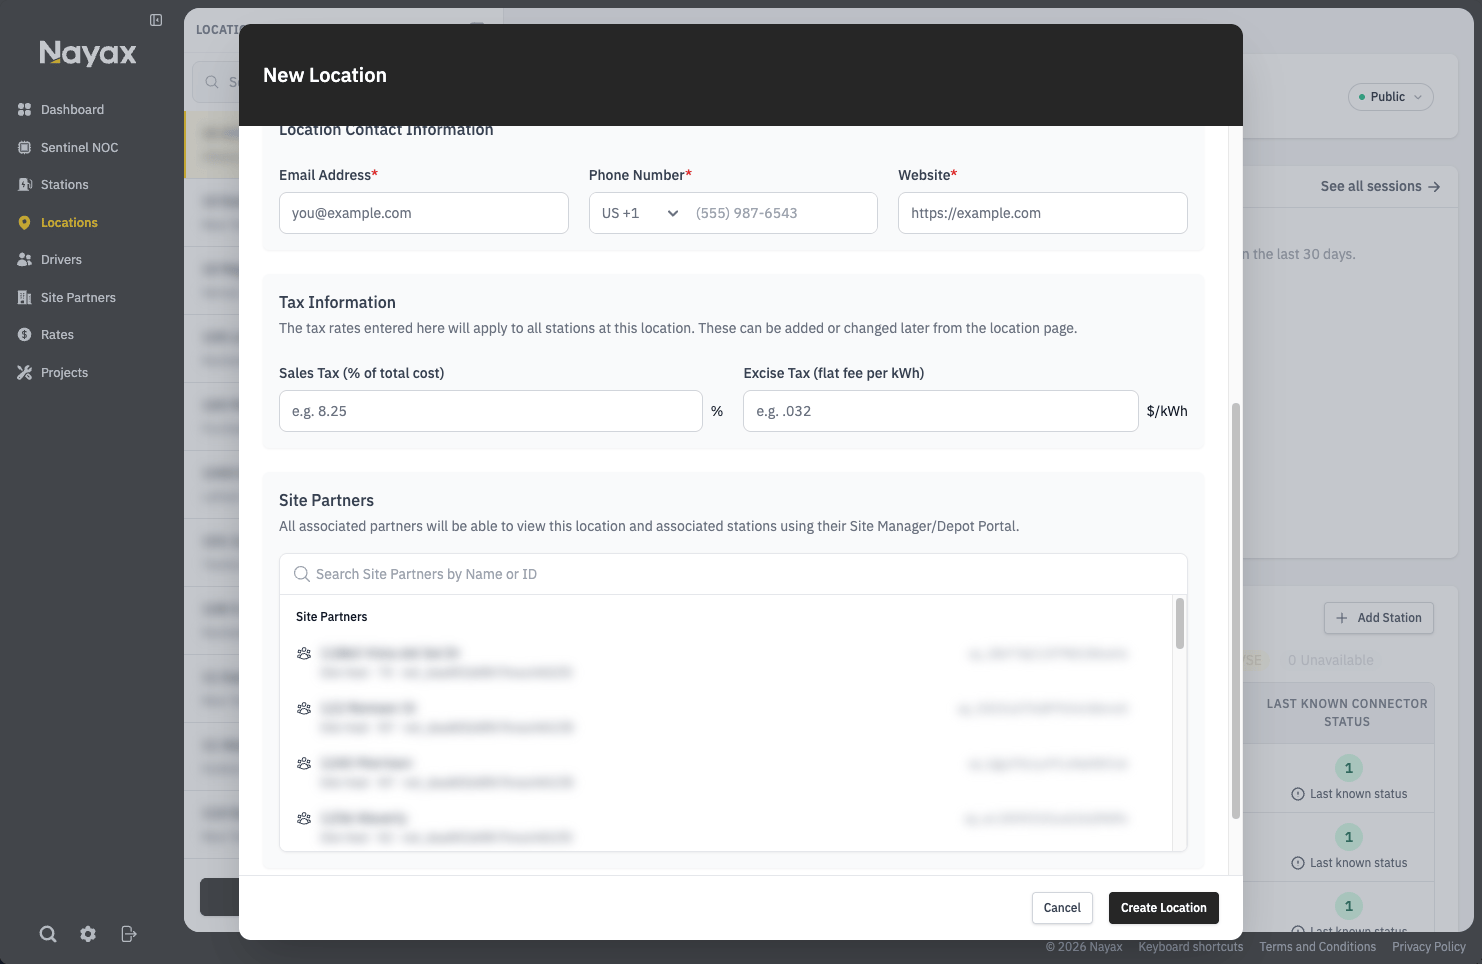
- Click Create Location to create the location.
Additional Configuration After Creation
After the location is created, you can complete your setup by configuring the following details from the location’s settings page:- Open Hours — Set the hours during which the site is available for charging. All stations will appear unavailable on the mobile app, outside of charging hours.
- Charging Stations — Add stations (assets) at the location.
- Energy Management — Configure panels and stations to distribute available power across stations when charging.
- Session Limits — Set maximum session durations or energy limits.
- Plug & Charge — Enable ISO 15118 support, allowing drivers to authenticate and start charging simply by plugging in. Contact support to get started.
Step 3: Add Stations
After creating the location, you can add charging stations (assets) to it. Each station represents a physical charger at the site.
Note: To ensure that onboarded stations connect to the Network Manager (CSMS), the OCPP URL configured on the physical station must be set to wss://ocpp-gateway.lynkwell.com.
To add stations:
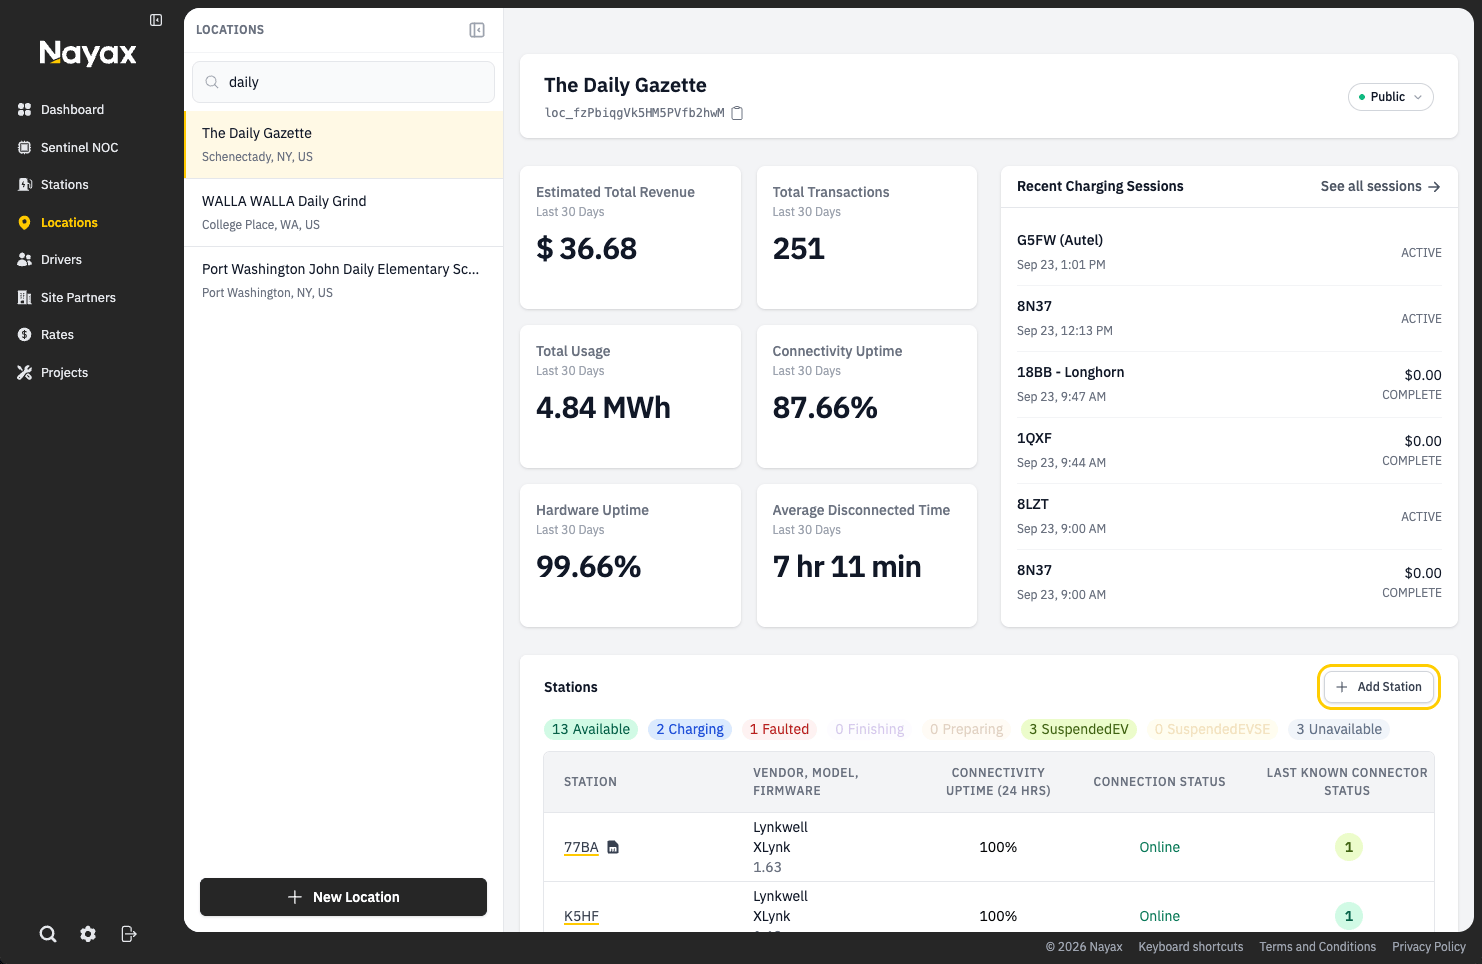
- Navigate to the location’s page in Network Manager.
- Scroll down to the Stations table.
-
Click the Add Station button. A form opens where you can add one or more stations at a time.
-
For each station, complete the following fields:
 Adding a station model manually If the station’s vendor and model is not available in the supported list, enter the hardware details directly:
 Verify the connector information carefully to avoid operational issues. To add more stations, click + Add Station to add another row. Note: When you add a new station row, the Vendor & Model and Rate from the previous row are automatically copied over — so you don’t need to re-enter that information for each station.
 - When all stations are configured, click Create Station(s) to create the stations.
Important: This is a synchronous process. Please keep the browser tab open while the stations are being added to avoid losing progress.If some stations fail to upload, you may address the errors and hit Retry Upload to upload the remaining stations to the location.
Bringing Stations Online
Creating a station registers it on the network, but a couple of things are needed before drivers can start charging. Connect the station to the network To ensure that onboarded stations connect to the Network Manager (CSMS), the OCPP URL configured on the physical station must be set towss://ocpp-gateway.lynkwell.com. This setting can be found on the station’s page in Network Manager, under Station Info. Once this URL is set, the station establishes a connection to the CSMS and comes online — this is what brings the station from a disconnected state to being connected and manageable through Network Manager.
Activate the station
Newly created stations are set to a Planned status by default. When a station is ready for use by customers, change its status to Active so that drivers can use it. This setting can be found on the station’s page in Network Manager, under Station Info. Once activated, the associated connector statuses in the mobile app will change from unavailable to available.
Step 4: Add Site Host Users
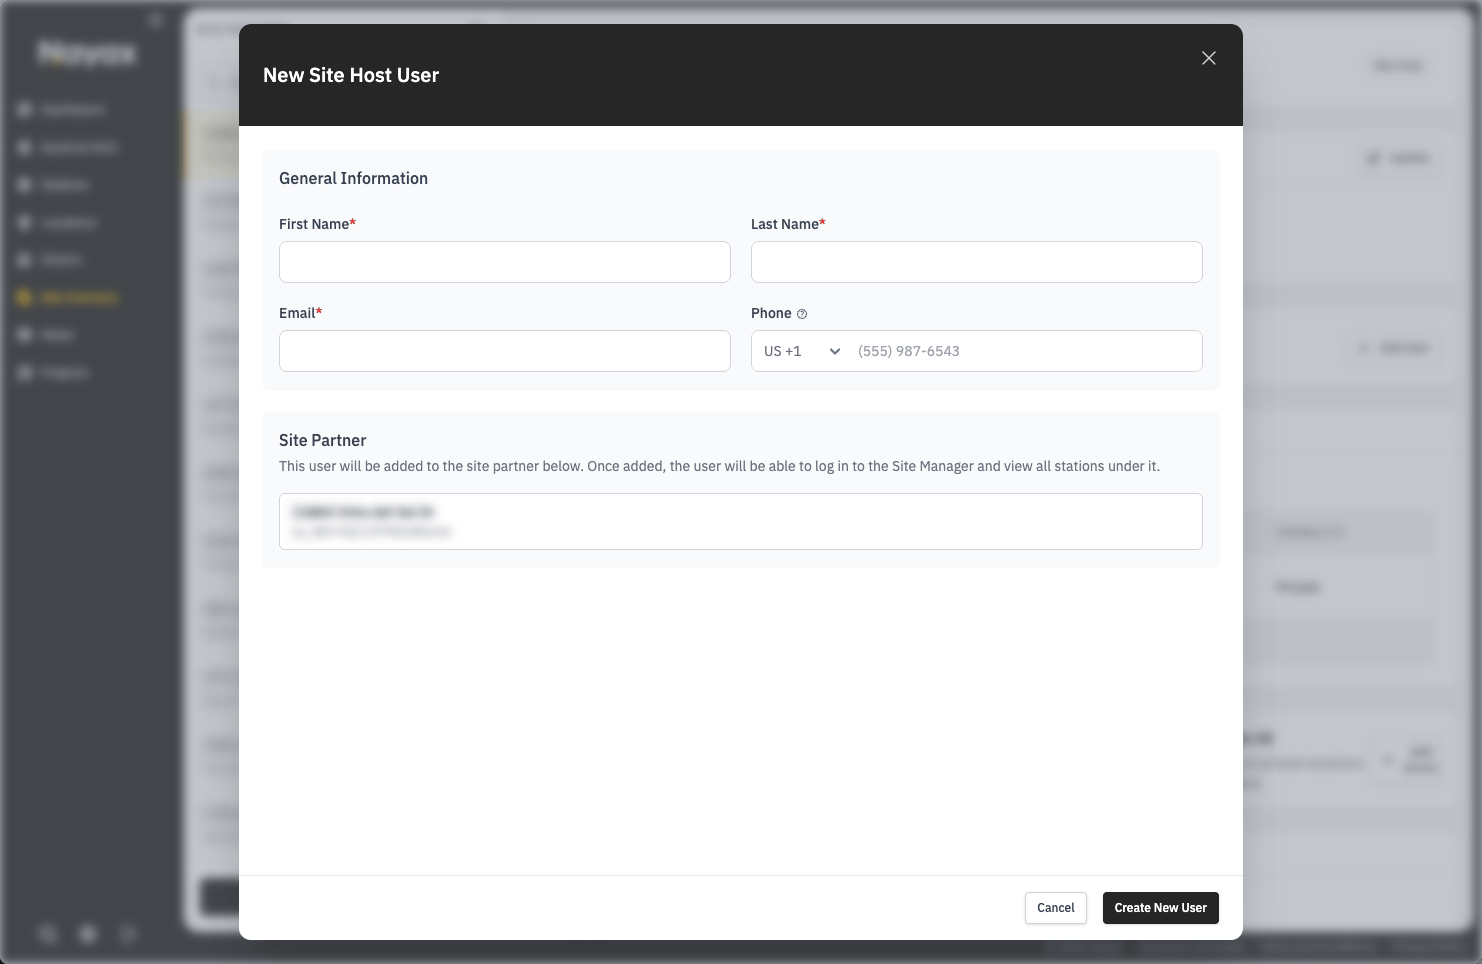
Site Host users can monitor and manage charging operations at their location(s) through Site Manager — Nayax Energy Core’s site-level management portal. To create a Site Host user:- In Network Manager, click Site Partners in the left sidebar menu and select the Site Partner the user belongs to.
- In the Users section, click the Add User button.
-
Complete the form with the following fields:
- Click Create New User to save.
Additional Features
- Driver Discounts — Site hosts can offer discounted pricing to specific drivers. Driver Discounts are created within the Site Manager. Driver access can be managed through either Site Manager or Network Manager.
- Private Location Access — For locations set to Private, site hosts can add authorized drivers under the Site Partner. Only these drivers will be able to access the private locations on the network’s mobile app. Driver access can be managed through either Site Manager or Network Manager.
Option 3: Via Nayax Energy Core API
For CPOs and partners who need to automate site provisioning or integrate Nayax Energy Core into existing systems, the Nayax Energy Core API provides programmatic access to create and configure sites. The API is organized around REST with predictable resource-oriented URLs under the Asset Management API.Note: The Create Site Partner, Create Site Partner User, and related write endpoints are not enabled by default. You must request additional permissions from Nayax Energy Core before using them.For full endpoint specifications, query parameters, and response schemas, see the Nayax Energy Core API Reference. The examples below demonstrate practical usage for setting up a new site.
Prerequisites
Before making API calls, you need to authenticate using OAuth 2.0 client credentials. See the Quick Start guide for instructions on creating an API client in Network Manager and obtaining an access token. All examples below assume you have a validACCESS_TOKEN.
Step 1: Create a Site Partner
Use the Create a site partner endpoint to create the business entity that will own the location. Thetype field determines which detail object you populate — include the matching object (siteHost, utility, or reportingAgency) for the type you select.
Example — Creating a Site Partner:
200 response returns the created site partner object, including its id (e.g., "sp_q354636xd4r0EZkG0"). Save this ID — you’ll need it when creating the location.
Step 2: Create a Location (Asset Group)
Use the Create a new asset group endpoint to create the location. In Nayax Energy Core’s API, a location is an asset group withtype set to "location". The sitePartners array links it to one or more Site Partners created in Step 1.
Example — Creating a public hotel location:
200 response returns the created asset group, including its id. You can use this ID with other API endpoints to add stations (assets), update location details, or manage site partners associated with the location.
Step 3: Create a Station (Asset)
Use the Create a new asset endpoint to add a charging station to the location. TheassetGroup field links the station to the location (asset group) created in Step 2.
Example — Creating a station:
200 response returns the created asset object, including its id. You can use this ID with other API endpoints to update station details or manage its configuration.
Note: For full request and response schemas, including all supported power types, connector types, and optional fields, see the Assets API reference.
Step 4: Create a Site Partner User
Use the Create a new site partner user endpoint to add a user who can access the location through Site Manager. Thepartner field links the user to the Site Partner created in Step 1 — they will have access to all locations associated with that partner.
Example — Creating a site host user:
200 response returns the created user object. The user will receive an invitation to set up their account and access their locations through Site Manager.
Additional Resources
- Full API Reference: API Reference — Complete endpoint specs, query parameters, and response schemas.
- Asset Management API: Includes additional endpoints for listing, updating, and archiving site partners, locations, and users.
- Support: Contact the Nayax support team for API access and onboarding assistance.